Today, let’s embark on a mission to bid farewell to the unwelcome mould guest. Fear not, for we’ve got the ultimate weapon in our cleaning arsenal: high pressure cleaning. In this step-by-step guide, we’ll walk you through the process of using high-pressure cleaning to eradicate mould.
Step 1: Assess the Battlefield – Identify the Mould Invaders
Before diving into the high-pressure cleaning extravaganza, let’s assess the situation. Identify the areas affected by mould. Is it lurking on your walls, decks, or perhaps in the corners of your patio? Understanding the extent of the mould invasion helps you tailor your high-pressure cleaning strategy for maximum effectiveness.
Step 2: Gear Up – Safety First, Always!
Now that you’ve located the enemy, it’s time to gear up for battle. Safety should be paramount. Grab your safety goggles, gloves, and a sturdy pair of shoes. Mould removal can stir up particles you don’t want in your eyes or skin. Think of it as preparing your superhero suit – invincible and ready for action!
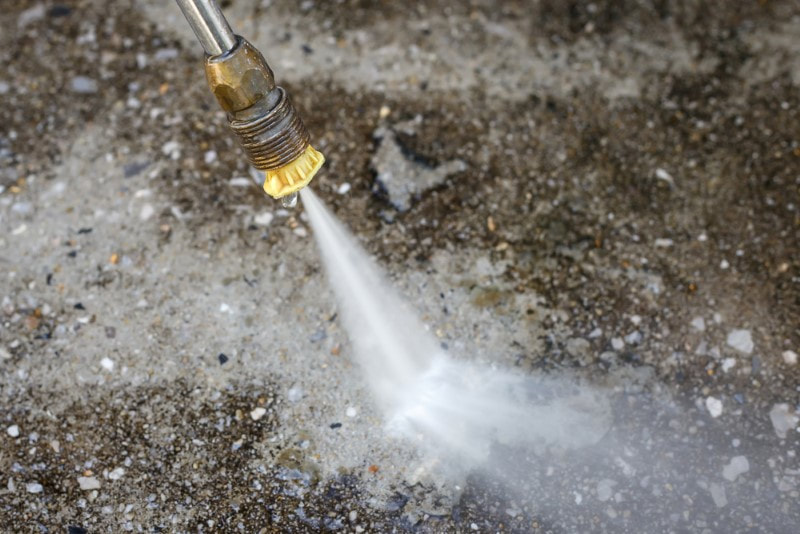
Step 3: Choose Your Weapon – Select the Right Pressure Washer and Nozzle
Enter the pressure washer, your mighty weapon against mould. But hold on! Before unleashing its power, ensure you’ve chosen the suitable pressure washer for the job. High-pressure cleaners come in various sizes and strengths. Once you’ve got the appropriate machine, select the nozzle wisely. Different nozzles deliver different pressures, so choose one that suits the surface you’re battling mould on – it’s like picking the perfect tool for the job.
Step 4: Mix Your Potions – Prepare a Mould-Busting Cleaning Solution
Time to concoct your mould-busting potion! Mix a cleaning solution suitable for mould removal. You can opt for commercial mould cleaners or create your own with water and mild detergent. Be cautious with the detergent concentration – too firm, and you risk damaging surfaces; too weak, mould might not budge. Think of it as creating a magical elixir that dissolves mould on contact.
Step 5: Pre-Wash – Wet the Area to Prep for Battle
Before the real action begins, give the mouldy area a pre-wash. Douse it with water to loosen the grip of the mould. This step ensures the cleaning solution can penetrate the mould more effectively during the high-pressure assault.
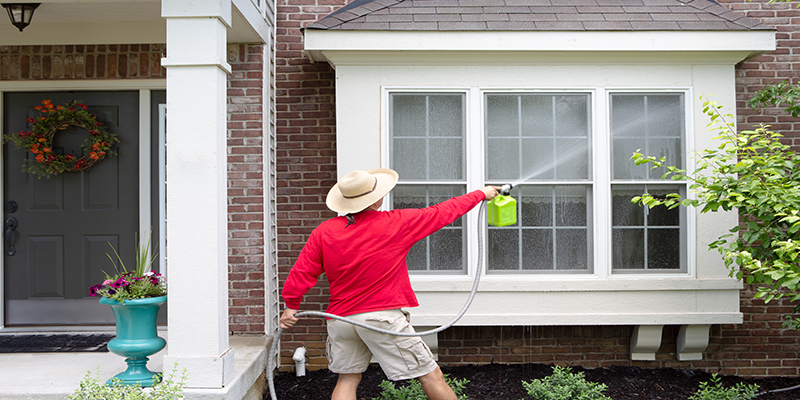
Step 6: Attack – High-Pressure Cleaning in Action
Now, it’s showtime! Fire up the pressure washer and start the assault on the mould. Hold the nozzle safely, usually a couple of feet from the surface. Move it in sweeping motions, ensuring even coverage. Imagine you’re painting over the mould with a powerful waterbrush. Remember, patience is vital – don’t rush the process; watch the mould surrender to the cleaning power.
Step 7: Rinse and Repeat – Thoroughly Cleanse the Battlefield
Once the high-pressure cleaning spectacle concludes, it’s time to rinse away the remnants of the battle. Switch to a clean water nozzle and thoroughly rinse the treated area. Make sure no cleaning solution residue remains. If needed, repeat the process until the mould is entirely defeated. It’s like ensuring the battlefield is spotless after a victorious clash.
Step 8: Post-Battle Inspection – Ensure Victory and Plan for the Future
With the mould defeated, it’s time for a post-battle inspection. Walk through the cleaned area, checking for stubborn mould patches or potential damage. Celebrate your victory, but remain vigilant. Consider applying a mould-resistant sealant to prevent future invasions. Think of it as fortifying your defences against future mould attacks.
Step 9: Dealing with Stubborn Mould Stains – Special Tactics for Lingering Foes
Ah, those pesky mould stains that refuse to retreat! Fear not, for we have a particular tactic up our sleeves. Consider using a mould stain remover or a mixture of white vinegar and baking soda for persistent stains. Apply it to the affected areas and let it sit before resuming the high-pressure assault. Think of it as a secret weapon to ensure every bit of mould is banished from your home.
Step 10: Tackling Vertical Surfaces – Defying Gravity with High-Pressure Wizardry
Mould doesn’t play fair; it often creeps up on vertical surfaces like walls or fences. To combat this sneaky foe, adjust your high-pressure cleaning technique. Start from the bottom and work your way up, ensuring the cleaning solution has enough time to break down the mould as it flows downward. It’s like outsmarting mould at its own game – defying gravity with high-pressure wizardry.
Step 11: Protecting Surrounding Areas – Shielding the Innocent from the Battle
In the heat of the battle, it’s easy to forget about the innocent bystanders – your plants, outdoor furniture, and neighbouring surfaces. Shield them from potential collateral damage by covering them with plastic sheets or tarps. It’s like providing a protective barrier, ensuring they emerge from the mould-fighting saga unscathed and ready to enjoy the victory with you.
Step 12: Environmental Responsibility – Disposing of Mouldy Water Wisely
As responsible mould fighters, we must address the aftermath. The water used during high-pressure cleaning might be tainted with mould spores and cleaning agents. Dispose of it responsibly, avoiding drainage into stormwater systems or natural water bodies. Consider collecting the water for proper treatment or directing it to a designated drainage area. Environmental responsibility is our duty, even amid victorious mould battles.
Step 13: Celebrate Your Victory
Congratulations! Take a moment to revel in your success. Your home is now mould-free, thanks to your determination and the power of high-pressure cleaning. Treat yourself to a well-deserved snack or a relaxing break. Celebrate the victory, knowing you’ve eliminated mould and contributed to a healthier and happier living environment.
Step 14: Document and Share Your Triumph – Inspire Others
Document your journey with before-and-after photos. Share your triumph on social media or with friends and family. Your experience might inspire others facing a similar struggle. It’s like spreading the knowledge and empowering others to take on these battles confidently and succeed.
Step 15: Establish a Routine – Preventing Mould’s Return with Regular Patrols
The battle might be won, but the war against mould is ongoing. Establish a routine for regular high-pressure cleaning patrols, especially in areas prone to mould growth. Consistent maintenance ensures that mould remains at bay, preventing its return and keeping your home in a perpetual state of cleanliness. It’s like setting up a protective perimeter, warding off mould and maintaining a pristine living space.
In Conclusion: Your Home, Mould-Free and Glorious!
There you have it– a step-by-step guide on using high-pressure cleaning to bid farewell to mould. With the right gear, the perfect cleaning solution, the mighty pressure washer, and searching for the best options for “mould removal near me”, you’ve transformed your home into a mould-free haven.